Back lighting & Sunflare
First a quick disclaimer. I am not the know all guru of sun flare and back lit images. This however is how I personally approach shooting them. There are many ways, methods and things you can do to achieve this so you do not have to do it the way I do. This is just to give you an idea of how I handle shooting in this method! This will be a multi part article because there is a ton of information to absorb. I will be sharing different photo examples as well as a video tutorial in different parts of this tutorial. This one mainly covers HOW I do things and gives pointers on how you can as well! I strongly recommend grabbing a cup of coffee and finding a nice quiet chunk of time so you can absorb all the info! 🙂 You could probably almost call this a class because its so much more multi faceted then an article traditionally is lol. To stay up to date and know when I post the other parts of this article please subscribe to my fan page and feel free to share it with all your friends!! http://www.facebook.com/myfourhens
It is Summer time here in Connecticut (and many other places around the world!) When I think of summer and summer inspired images I think of things like sun, the beach, picnics, color and all the amazing photo opportunities. I have learned many things in my journey as a photographer. What kind of light to look for, where to position myself to get flare, what settings yield good results, how to trust my instincts in different lighting scenarios and most importantly what time of day to shoot to get the kind of light I really want in my photo to portray the mood I am going for. Different times of the day will definitely give you many different end results. For example shooting at 3:00 pm with the sun higher in the sky is going to look totally different then shooting 7:00 pm an hour before sunset. Not only is the quality of light going to be different but you are going to have a totally different tonality to your photographs as well!!
I shoot with primes (meaning lenses that do not zoom) only. When I am photographing my subjects I am constantly moving. I have to. My feet have to do the zooming for me. When I am trying to capture flare I will literally move around my subject looking in my view finder until I can literally see the sun in my camera. With that being said NEVER look directly into the sun with your camera. It can be dangerous and damage your equipment.Sometimes in order to get that sun in my camera I have to get VERY low to the ground. There are actually times when I am laying down shooting upwards, crouching, leaning or even contorted to some odd strange unnatural position to get the shot I want LOL! I am sure that people think I am insane when I am working!
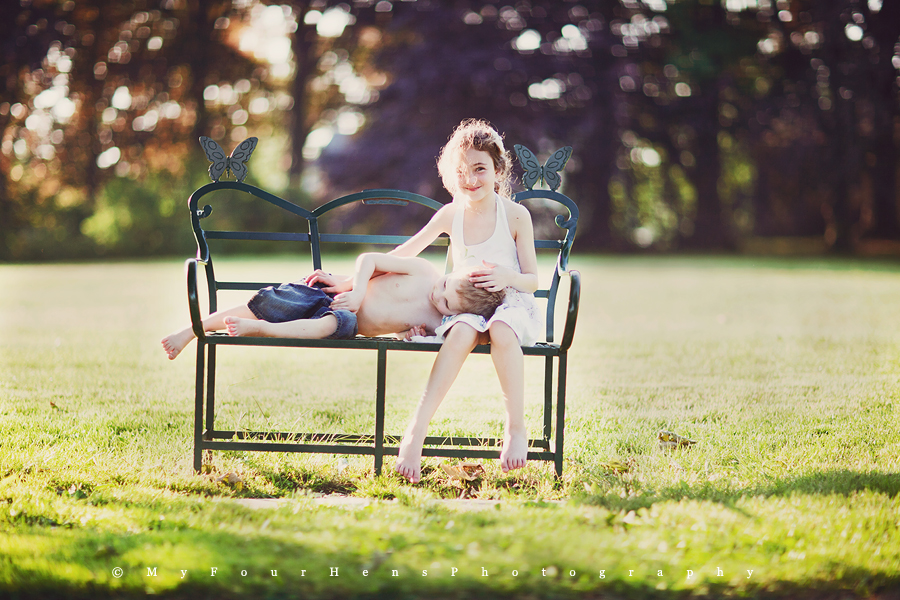
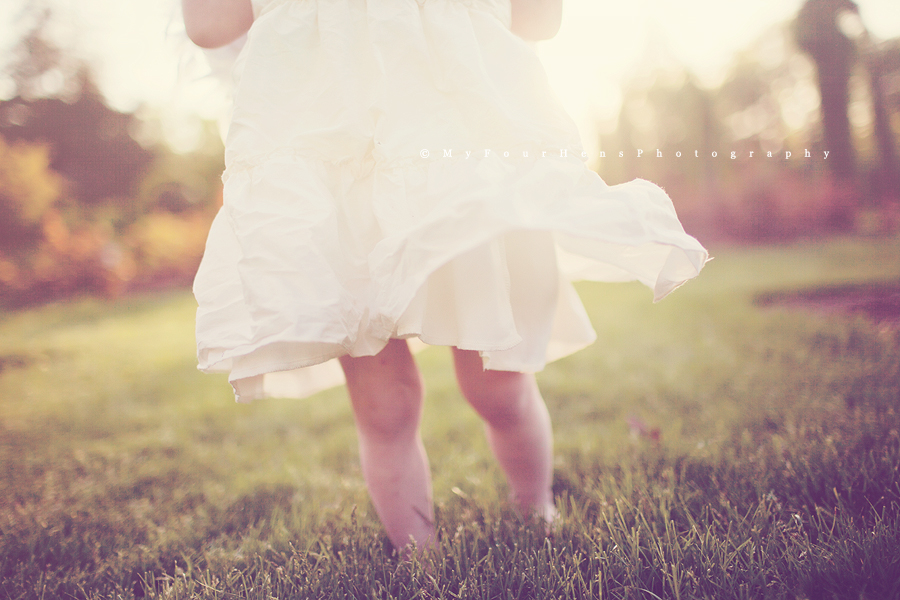
An important thing to know as well about shooting flare is it is going to be easier to get flare later in the day when the sun is lower. It is of course possible anytime of the day. The kind of flare I do prefer however is the kind that comes with the golden hour. It has a magical quality in my opinion! It is also much easier to get because the sun isn’t as high. 🙂 The Golden Hour is generally an hour before sunset. Practice of course also makes perfect when learning anything new photography related. Also try shooting in raw if you don’t already. It gives you a TON of wiggle room and makes processing your sun flare photos MUCH easier. Another huge component of shooting sun flare is back lighting. Back lighting is when you essentially turn your subject’s back to the sun opposed to facing in to it. When you do this it you will get that soft glowly hazy feel to your photographs that I get asked about much of the time. The reason I choose to back light a lot of my images is because it gives you more control over the light. Also when you have harsh sun and you face your subject in to the sun instead of away it casts harsh light and shadows onto the face as well as creating dark holes where the eyes are (which is not only unflattering but can really ruin a photo) or makes your subject feel the need to squint which is also undesirable. I personally do not use a reflector but this is where one does come in handy! By using a reflector you can bounce the light back onto your subjects face. You can also look for “natural” reflectors or any area where there is something white or light colored to bounce and reflect light back onto your subject such as a white wall, light sand, sidewalk etc. Even wearing a white colored shirt while shooting can be helpful. On the other side of that note wearing a loud color while back lighting can be detrimental because you can reflect that color onto your subjects skin (i.e wearing a hot pink shirt can give the person you are photographing a hot pink cast on their face and skin)
I mentioned shooting RAW. For those that do not know what RAW is it is basically a digital negative. It is a whole different subject I tend to delve into one day because I really feel like my processing and RAW go hand in hand. Imagine yourself shooting a film format camera. Now imagine taking the roll of film you shot into a camera store to have developed. Your photos are not quite “whole” yet. That is what RAW essentially is. You are taking a negative and developing it digitally via Photoshop or other RAW capable programs. When I shoot backlit images I tend to start with a photo that is a bit underexposed. I can do this BECAUSE I shoot RAW. JPEG would make it MUC H harder as you are giving your camera complete control over your overall exposure, sharpening etc. Now you can edit a JPEG with a raw editor format in photoshop however the more you do to a JPEG in photoshop the more the overall photo quality degrades. (We will save this for another day but just keep that in mind 🙂 This is also why I choose to duplicate the main photo layer in my actions.
Anyhow now I am out with my lenses, my camera gear, camera etc and I am ready to take some photos!! I am looking for that perfect flare. Here is a break down of some tips to really help me achieve this.
I shoot full manual meaning I choose my own settings for each photo I shoot. I do not allow my camera to do this for me. I love to shoot wide open but when I am looking to shoot flare I try to stop down a bit more as it will give you a much more defined star burst type shape. My flare errs more on the sloppy side I admit LOL Its more milky, hazy and less defined because like I mentioned I shoot more wide open (i.e aperture like 1.2, 1.4, 1.8, 2.0 etc) Just remember when shooting manual the term every action has an opposite and equal reaction meaning when you expose your image make sure your shutter speed and ISO compensates for your aperture. The meter in your camera should be around the middle mark. It doesn’t have to be exactly in the middle (and sometimes you may need to over expose so the skin isn’t to underexposed so the meter will be a tiny bit to the right or left depending on your situation but that is certainly something to keep in the back of your mind. If you are wondering what it means to meter your meter is the little bar in the middle of your view finder when you look through. For example when I look through mine ( I shoot with a canon 5d Mark II) I see from left to right my battery life (a little battery icon) my shutter speed, then a bar (my meter) with my aperture on the left of it, a triangle icon (resembling an arrow of sorts) directly in the middle of my meter bar and then my ISO to the right of the meter. If you adjust your settings you will see the line in the meter actually moves around. You want that line to be as close to the middle as possible. When I am photographing my subject I usually half press my shutter and meter for the skin and adjust my exposure. I don’t mind underexposing a little bit at all because I will get more of whats behind my subject exposed so its not completely lost and then because I shoot raw its easier to find a middle ground. You do not want to under expose TOO much because you run the risk of introducing bad grain or noise into your photos. Over exposing can actually be slightly more forgiving if you shoot raw as long as you haven’t completely lost detail. Learning to use your histogram will really help you out here as well. I actually use my histogram opposed to my LCD screen when I shoot just to be safe. To summarize really learning how to meter, and how your settings work together will give you FULL control of your images. I am not against shooting in AV or TV mode by any means but shooting manual will really give you a leg up. Reading your camera manual, plugging into forums such as clickinmoms.com, the bloom forum or Ilovephotography.com and practicing a LOT will really help you get familiar. After a while shooting in manual does become second nature it just takes a lot of time and patience!
Learn to see the light. You don’t have to be actively taking photos to look for good light. I do it all the time in fact. In the car, out with my family, everywhere! I am always noticing! One day just take a person and walk a complete circle around them. Watch how the light moves about them especially their face. Watch how the shadows differ. Move them to different areas of where you are at and watch how the light changes. Try positioning them in front of a window, look at the light. Now position them with their back to the window and see how the light has changed. Now take your camera and do the same. You don’t even need a person, use a doll, a toy, or any solid object. Do the same thing but outdoors turning your subject in front of the sun and then their back to the sun. Really training your eye will go a long way!
Different lenses will yield different results! Different focal lengths, apertures, and where you stand as you take the photos will definitely make a difference!! Using a wide angle or fish eye lens may be MUCH easier to get flare with then obviously a “tighter” lens such as an 85mm. Experimenting with where you actually put your subjects and then move to take the photo at will yield VERY different results!! Trying slowly rocking or moving from the left or right and watching how the sun changes in your view finder as you are photographing your subjects. Don’t be afraid to move!!
Utilize the Golden Hour. The Golden Hour as I mentioned above is the hour before Sunset. It is called the Golden hour because the light actually takes on a golden quality sometimes. If you bring your subject out around this time and play with the light and practicing you will really find that the flare is much easier to achieve especially!
Practice makes perfect. I can not stress this enough!!
Thanks so much if you made it all the way to the bottom lol!!!







Thanks for the tips. I am new to this but your style is amazing! I am so glad I read this because I have been trying to shoot right at the sun… whoops! One question though- you mentioned getting to the middle of your meter- even when shooting towards the sun? I guess that part confuses me because If I set the fstop low (1.8, 2, etc.) and then adjust to get in the middle then I am shooting more like a silhoutte… or do I start there and then adjust to get to what I am looking for? Thanks, Sarah!
Just found this post and absolutely loved it. So helpful! I have been searching for Part 2 with the before/afters and a tutorial but can’t seem to find it. Is there Part 2? Thank you!!!
There isn’t yet! Soon though! 🙂
I’m so happy to have found this post! Came here from CM and am bookmarking your site. 🙂
Wow that was one of the most helpful and inspiring posts I’ve read in a while! Plus the pics are gorgeous.. love your talent!
just discovered your blog, and i’m in LOVE! thanks so much for sharing all your talent, and especially for this post on sunflare. i CANNOT wait to try the tips you shared!!
🙂
beauty!!!
you are the natural light queen! Thanks for sharing your wisdom 🙂
LOVE your use of light, sarah! you’re such a rockstar! xoxo great tutorial, too 🙂
Such a great post Sarah! Thank you for sharing!!
Thank you so much for sharing! I will definitely stay tuned!
: )
Amy
Thank you Sarah!! Awesome can’t wait for more:-))
Thank you so for sharing! I can’t wait to hear more!
I am so excited about this!! Thank You Sarah!! I can’t wait for Part II 🙂
Excellent article and just in perfect time. I’m doing a couple shoot this weekend involving late afternoon sun high up on a hill….
thank you for taking the time to share. it is much appreciated.
These are beautiful, Sarah!! Love how you use light. 🙂
You are amazing. Thank you for taking the time to write all that out! PS- I’m a prime girl too, hehe 🙂
Awesome post, Sarah! Love the images!
GREAT tutorial, Sarah! I can’t wait for more!
Please know that this is sooooooo appreciated! I was actually trying to practice sun flare last night and did not do so well. First of all, I didn’t know not to point my camera directly at the sun! Also, after reading this I am definitely going to aspire to shoot manual ASAP. AV has spoiled me in that I get a consistent result but like you said, I don’t have full control. It’s so intimidating, but with helpful articles like this I may just get there! 🙂
c magnifique!!
I love backlighting! Great tips Sarah!
Excellent, i thoroughly enjoyed every word of that article and cant wait to try it out….thank you 🙂 your photos are amazing
Awesome post! Thank you so much!!!
I LOVE LOVE LOVE this look and it’s always so nice to hear how YOU do! Your work really inspires me and I appreciate your tips, much appreciated!
Thank you so much for posting this!!! I am a new photographer and this is so… helpful! I can’t wait to try these new tips and tricks and read part 2. Totally going to read this again this afternoon!!!